Ceramic wall and floor tiles are very sturdy and can last for years. Therefore, when their style or colour starts to look dated, it seems like a waste of time and money to rip them all out and replace them. Instead, why not just paint these tiles? You do not have to be particularly skilled at DIY to do so!
Painting the old tiles in your kitchen or bathroom can change the whole look of the room and it is an easy way to revamp your home without spending too much money. However, you must have the right equipment ready to do so.
Below is our simple guide on how to paint your old tiles!
Gather Your Tools & Materials
To paint any ceramic tile, you will need to get together a range of tools and materials to get the job done.
Tools
- Masking tape – This is essential as it sections off the tiles and prevents you from getting any paint in the grout lines or on the surrounding areas.
- Paint roller – A paint roller is an ideal tool to ensure that your paint is even.
- Paint tray – If you are using a paint roller, you will need a paint tray to empty your paint into.
- Paintbrush – If you are looking for a more precise finish or are looking to add any patterns onto your tiles, you will need to have a paintbrush in your toolbox.
- Gloves – To prevent your hands from getting covered in paint, you’ll need some gloves to wear.
- Scourer – A scourer is essential for deep cleaning the tiles before you start to paint them.
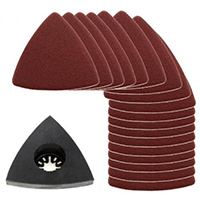
- Sandpaper – You will need to sand the tiles down before painting them so that the paint can grip. This will prevent chipping.
Materials
- Tile cleaner – Again, this is essential for deep cleaning the tiles before you paint them.
- Basecoat paint/primer – This will properly prep your tiles before painting and will help your paint last longer. However, this may not be necessary depending on what kind of topcoat you are using. Be sure to check the label of your topcoat to see whether or not it needs a primer to go along with it.
- Topcoat paint – This is the paint that you will use to transform the colour of your tiles.
- Pattern stencil (optional) – If you would like to paint a pattern onto your tiles, investing in a pattern stencil is a good idea as it gives you a precision that does not come with painting patterns by hand.
Which Types Of Paint Are Best For Ceramic Tile?
One of the most important things to take into account when painting your tiles is what type of paint you will be using. Different paints will have different finishes.
Latex
When using latex paint, you will need to apply a primer to help the latex paint closely bond to the tiles.
Acrylic Latex
Acrylic latex is also good to use to paint tiles. You can get acrylic latex paint in both semi-gloss and high-gloss options. This type of paint is probably better for wall tiles as opposed to floor tiles, as it can chip fairly easily and will likely not last long due to daily wear and tear.
Enamel
Enamel paint is oil-based which makes it very durable. This is the ideal paint to use when you paint tile floors due to how long-lasting the formula is.
How To Prepare Your Tiles For Painting
Before you begin the painting process, you must make sure that you have sufficiently prepared your tiles. To prepare your tiles, all you need to do is follow a few simple steps.
Thorough cleaning
You will not get a particularly even paint if there is any kind of dirt or residue on your tiles, as this will create lumps and bumps. It will also prevent the paint from properly bonding to the tiles. Therefore, thoroughly cleaning the tiles is crucial.
Use a heavy-duty cleaning solution and a scourer to deep clean the tiles. Wipe off any residue with a damp sponge and give the tiles an adequate time to completely dry before moving to the next step.
Sanding
Use sandpaper to remove the glossy finish from your tiles. This will give the paint primer something to grip onto and will make your soon to be painted tiles last much longer.
Once you have sanded the tiles down, be sure to wipe away any leftover dust with a damp sponge or towel.
Mask around the tiles
Use masking tape to section off the tiles. This will prevent you from getting paint anywhere you don’t want it, like the grout lines between the tiles or on any floor or wall space near the tiles.
Painting Ceramic Tile – Step By Step Guide
Once you have prepared your tiles, you are ready to begin painting!
Step 1: If necessary, prime the tiles
If you require a primer, paint it onto the tiles with a small paintbrush for precision. Paint in small, thin strokes to prevent any lumps or bumps from forming. Leave the primer to dry for several hours.
Step 2: Sand down the primer
Using sandpaper again, lightly sand your primer once it has dried. This gets rid of any small bumps that may have appeared and also helps the paint bond closely to the tile. Make sure to wipe away the dust with a damp sponge.
Step 3: Apply the first coat
After your primer has dried, you can begin to paint on the colour. Using either a paint roller or a paintbrush, apply a thin coat of paint. It is important to keep your coats thin as it prevents clumps of paint from forming and also avoids brush marks showing once the paint has dried.
Step 4: Allow the first coat to dry
Allow your first coat of paint to dry for at least four hours before going in with your second coat.
Step 5: Apply the second coat
Apply another thin coat of paint. If it looks as though you may need another coat after this, leave your tiles for another four hours before going in with a third coat.
Step 6: Leave the tiles to dry for 24 hours
Leave the tiles to try for at least a full day. Try and avoid touching the tiles as much as possible for a week after painting to allow the paint to fully settle.
Top Tips For Painting Tiles
Now that you’ve got to grips with the basics, here are some of our top tips for getting the most out of painting your tiles!
Ensure the tiles are super clean before painting
If there is any dirt or dust on your tiles, this will show under layers of paint. It will also prevent your paint from bonding properly with the tile as the dirt will create a small gap between the tile and the paint.
Therefore, it is important to clean down all your tiles with a strong cleaning solution and a scourer.
Remove sealant
If the tiles you are painting are in a bathroom, remove any sealant around the tiles beforehand. Sealant cannot be painted and will likely get in your way whilst you try to paint your tiles. Remove the sealant and then re-seal any gaps again after you have finished painting.
If it is not possible to remove the sealant, tape over it with masking tape to keep it out of the way.
Don’t re-grout after painting
If you need to re-grout your tiles, do this before you start the painting process. Grout is abrasive and can remove the paint if you try and apply it after painting your tiles.
Avoid using abrasive cleaning fluids on the tiles after painting
Any type of abrasive product is a no go as it will strip the paint from the tiles. There are plenty of gentler cleaning alternatives that you can use instead.
FAQs
Is a brush or roller best for painting floor tiles?
This largely depends on the style and size of the ceramic tile that you are painting. Paintbrushes might be more suitable for smaller tiles, whereas, rollers might be better for bigger tiles. It is handy to have both a paint roller and paintbrushes in your toolkit as you never know when each might come in useful.
What’s the best tile paint for ceramic?
This depends on where the tiles you are painting are. Latex and acrylic latex paints have very glossy formulas and look great on any wall tile, particularly on kitchen and bathroom walls. However, these paints are quite prone to chipping so it is best to use them on tiles that aren’t regularly touched.
Enamel tile paint is the ideal paint to use on any floor tile. It is an oil-based paint which means it is not prone to chipping. The hard-wearing nature of enamel paint’s formula makes it the perfect floor tile paint.
Is it hard to add patterns to my tiles?
Not at all! You do not have to be a gifted artist to add a pattern to your ceramic tile. You can find patterned stencils in your local hardware store as well as on many websites. Simply hold these in place over your tile and paint with the colour of your choice.
Alternatively, if you are naturally artistically talented, you can try to paint ceramic tile designs by hand.
Is priming tiles always necessary before painting?
It is not always necessary to add primer before your paint ceramic tile. Depending on what top coat of tile paint you have chosen, you may not need to use a primer beforehand.
If you buy paint that is specifically made for tiles, it is unlikely that you will need a primer. Be sure to check the label of your topcoat paint as it will tell you whether or not to apply a primer.


